
🔧 Upgrade your clean game with the ultimate Bissell hose replacement!
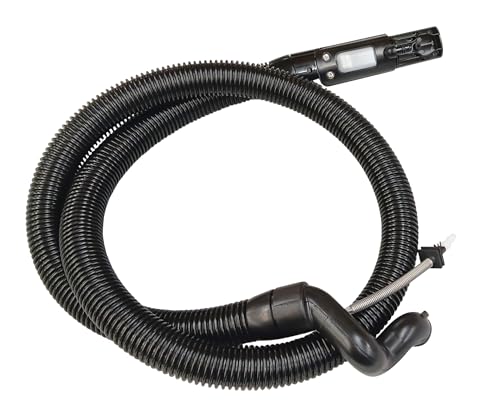
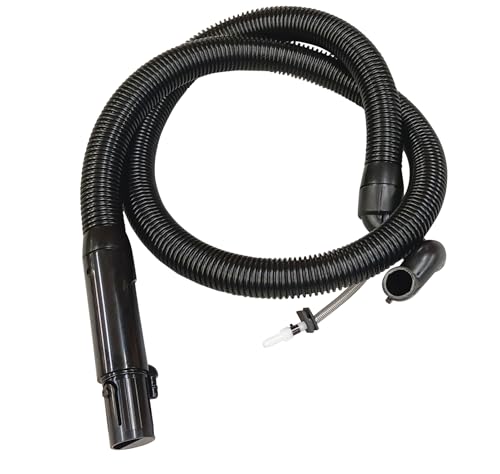
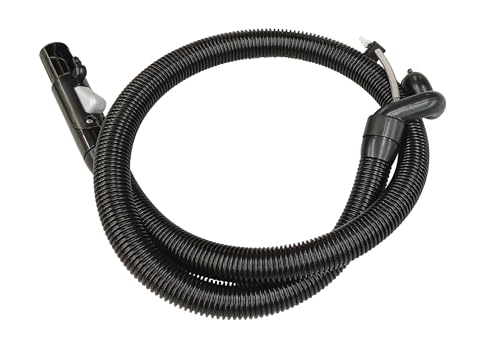
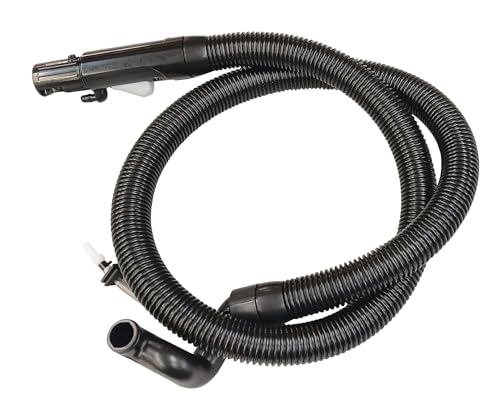
The Bissell Attachment 27F6 35K3 73H5 94Y2 Liftoff Cleaner Hose is an OEM authorized replacement part (model 2037905) designed for various Bissell SpotClean models. Made in the USA, it offers a precise fit and durable construction, enabling easy DIY repairs to restore your vacuum’s optimal performance. Highly rated by users, this hose replacement ensures your cleaning routine stays uninterrupted and efficient.

| ASIN | B00BIZRZKY |
| Assembly required | No |
| Batteries required | No |
| Best Sellers Rank | #278,762 in Home & Kitchen ( See Top 100 in Home & Kitchen ) #174 in Vacuum Hoses |
| Customer Reviews | 4.6 4.6 out of 5 stars (1,884) |
| Included Components | Hose & Handle |
| Is Discontinued By Manufacturer | No |
| Item Weight | 10.8 ounces |
| Item model number | 2037905 |
| Manufacturer | Bissell |
| Product Dimensions | 1 x 1 x 1 inches |
| Warranty Description | 30 Day Warranty |
K**N
Great replacement
The hose on my Bissell SpotClean wet vac developed a hole, so it did not work well anymore. This replacement hose was easy to install after watching a video on YouTube, and has worked great.
I**W
Great for a Do-It-Yourself Repair
Perfect fit replacement hose for the Bissell SpotClean Pro I have. It's a shame that Bissell refuses to sell this part or even list it's part number on their website, instead directing you to an "authorized service center". Having done the replacement myself, it's not the easiest job in the world, but for someone with a phillips screwdriver and a pair of needle-nose pliers it's not terribly difficult. For those who are interested, here's the procedure: 1. Detach both the solution tank and the waste tanks from the unit. 2. Remove the six screws that hold the outer shell to the unit. Two are at the bottom of each side and one at the very top of the arc. 3. Remove the three screws that are on the cord wrap assembly. Two are in holes in the wrap arm and one is under where the solution tank sits. 4. On the hose wrap, you should be able to feel a spot at the bottom of the round grey sticker on the side where there is a void behind. Carefully push a flathead screwdriver into this, and pull back to gain leverage to remove the sticker. Peel slowly with even pressure to avoid damaging it. 5. Now remove the five screws that hold the hose wrap to the side casing. At this point the hose wrap and the outer shell can be completely removed. 6. Between the two chimney-shaped tubes that feed the waste tank, there are two screws attaching them to the motor housing assembly. Remove these next. 7. Now remove the four screws that hold the lid of the motor housing onto the body. Two are in deep pits toward the outside of the unit and the other two are exposed toward the middle. I had to use a right-angle screwdriver to do the middle ones since they are underneath an overhang, but it may be possible to remove them carefully at an angle with a bigger screwdriver. 8. Lift the cover off of the motor housing and use needle nose pliers to loosen the two hose clamps that attach the T-shaped connector. 9. Attach the new hose's T-shaped connector and put the hose clamps back into place. 10. Make sure the rubber gasket around the solution hose lines up with the notch in the motor housing, then reattach the lid and screws. 11. Reattach the two chimney screws. 12. Reattach the outer shell pieces, making sure all the tabs that lock them together are correctly aligned, then reattach the six outer shell casing screws you removed in step two. 13. Reattach the three cord wrap screws. 14. And finally, reattach the hose wrap and it's five screws, then reattach the round grey sticker.
A**Y
Fits and works perfectly
After a good 10 years of use, the hose on our liftoff unit split, and the end that holds the wand cracked. I picked up this hose and it fits and works perfectly. Recommend that you watch the Youtube videos on how to do this. Very simple to do, but the videos are helpful.
P**N
Great replacement hose
Great replacement hose compared what originally came with the unit
A**R
It fits well
Haven't used it yet.took me about 45 minutes to install .saved $$ doing it myself. A shop quoted me $135.00 claimed it was a very hard job 😆 what a joke. It was easy for me.im waiting for gaskets for my dirty water tank before I can try my new hose out. I will update when I use it. looks 👍 👌 well find out.dont let these shops rob you on installing it. take your time lay it out in order & on tear down take pitcher's if you want. You can do it. hope this helped 🙏 thanks.Update I got my tank gaskets all put together. Works assume lots of sucksune .shampooed my huge recliner & huge couch did a beautifull job hose worked perfect . Not to stiff good solid hose.i will buy more from this seller ausume products. im happy to have my shampooer back .Oh buy the way my son did all the shampooing assume son. He HELPS ME A LOT. THANKS HOPE THIS HELPS.
G**N
For a little more cost it could have had a quick-connect on both ends
The Bissell Spot Clean is a compact cleaner for small jobs such as furniture. For that, it works fairly well given that it is relatively small. I do have a problem with the manufacturer's hose storage method that places stress on the coils at the ends. If you want the hose to last then do not coil it up as Bissell intended. But you are here because you too must replace the busted Bissell hose. If both ends were quick-connect then this would take about 30 seconds. Unfortunately, the hose end at the appliance requires a person to disassemble the vacuum to get the old part off and replace. Fortunately, there are several videos on the web that show exactly how to do it. It really is easy, about 16 or so cross head screws of two different lengths. It took me about 30 minutes to perform the replacement the first time, but only about 15 minutes to repair another one. So by saving a little in manufacturing costs, Bissell makes us coil up the hose and replace where it breaks at the flex end. We still like our Bissell Spot Clean and I am getting faster at replacing. So it really does not take much thought. This is the part that fits the Spot Clean Pro. It will probably also fit the pet model. When yours busts, don't waste time trying to patch with tape, just get this hose, study the videos, have a Phillips and needle nose pair of pliars ready, and do it.
D**N
Good purchase
Exactly what i was neeting
J**Z
Muy bueno
س**ي
المناج غير ذو فائده لم يركب ع الغساله
J**J
Bien, la instalé en pocos minutos, siento que es más flexible y quedó bien, hasta ahora después de dos usos funciona
Trustpilot
3 days ago
1 month ago