๐ฅ Keep Your Ride Cozy All Year Long! ๐ฅ
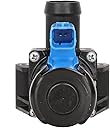
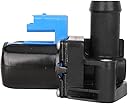
The BM5Z-18495-C HVAC Heater Control Valve is a premium quality engine coolant bypass valve designed for select Ford models from 2013 to 2017. It ensures optimal temperature regulation for your vehicle's heating system, providing comfort in all seasons. With a direct fit and easy installation, this valve meets or exceeds OEM standards and comes with a 12-month warranty for a worry-free purchase.
| ASIN | B07D1JBYQS |
| Brand | MNJWS |
| Brand Name | MNJWS |
| Customer Reviews | 4.4 out of 5 stars 228 Reviews |
| Inlet Connection Type | Sweat |
| Item Weight | 15.84 ounces |
| Manufacturer | MNJWS |
| Manufacturer Part Number | HCV-FC-001 |
| Material | Titanium |
| Material Type | Titanium |
| Number of Items | 1 |
| Outlet Connection Type | Sweat |
| Unit Count | 1 Count |
L**Y
Worked great! Perfect fit. Here are some tips to make this a quick fix!!
1. Optional method... Don't take off the whole valve unit!!! This method will only take 20 minutes. Other wise you will have to deal with getting the hose pipe off and those two screws on an odd angle. Very tight space and a real pain. You could also damage the hose pipe and have more problems. Instead take out the four screws on top of the OLD valve and remove. Make a note of the internal alignments. It uses four torx screws to secure the top valve. (Sorry, I don't recall the size) I bought standard set of cheap torx screw drivers from Harbor Freight. Also, all the major hardware stores carry them. 2. On the new valve take out the four screws and remove the top valve. Make sure you pull out slowly. (Take a cell phone pic of alignments). 3. Install the new valve in the old base. Make sure you move over the new rubber seal. Other wise you will have leaks. 4. Use the OLD torx screws to install the NEW valve to the OLD base. You may want to use a magnetic tip extender to start the screw install. 5. I had to use an ODB2 to clear the warning light but it may have gone away after a drive cycle. 6. Check for leaks. 7. Drive with a smile on your face as you just saved hundreds of dollars! Take the family for a nice dinner with the savings!!
K**M
Super easy, barely an inconvenience.
Got the infamous DTC P26B7 code on my 2013 Escape. This part solved the issue and took virtually no time to install. I took the advice of other reviewers and only swapped the top half (solenoid and casing) out instead of pulling the entire valve assembly because the top is the actual part that fails. I recommend magnetizing your T20 bit before doing it this way as the rear right torx screw is difficult to put back in due to its cramped location. The entire job took less than 20 minutes and four engine cycles to clear the code.
T**E
Perfect fit for 2014 Escape with 1.6 turbo Save yourself $100's of dollars
Took the car to the Ford Dealer to trouble shoot the code and found out the Heater Control Valve Engine Coolant Bypass Valve was to blame. They quoted me a price of $336.00 for parts and labor that included a fluid recovery cost OMG so after I came to and gather my composer I went on line and ordered this part BM5Z-18495-C HVAC Heater Control Valve and did the install myself and here's how I did it. #1 Leave your car set over night ( to let coolant levels drop in engine) and to avoid more than a cup of antifreeze loss (you will loose some) #2. zip tie hoses near the valve so you have room to remove the main hose going into the valve #3 Use a hose clamp tool to remove the "constant pressure clamp" this is hard to do without those pliers but it can be done without them #4 Zip tie that hose in the air as far up as possible to avoid coolant loss and (air-gap) in you system #5 Remove the connector, you'll need a small screwdriver (flat blade) to press in on the release clip, 2. 8mm bolts (these are long) you'll need a swivel tool with your socket. Note have your new part ready to go because you will loose coolant as soon as you remove the old valve #6 Reinstall in reverse and the rest is common sense (add fluid check for leaks run heater check for no-heat due to air in system and the final part put the $300 savings in your pocket you saved doing this yourself
C**J
Failed
Failed after a year. No good.
A**R
fits
fit correctly functioned properly
E**N
cheap and easy to install
It was easy to install and it cost way cheaper than original. No problems so far after few months installed.
S**E
Hopefully it will last
It is a common issue on some ford engines. I tried to get one from the Ford Dealership, they asked a lot of money for the part only. Also, I was told I need to program the PCM after replacing it. I decided to do it myself. It was not hard at all. I took my time and got it replaced. Deleted the Check Engine Light using my code reader. Driving it for 3 days now and it is not coming back. Very easy repair and problem solved.
R**A
Lasted 2-1/2 years
Purchased in May 2021, failed in August 2023. Installed on a 2015 Escape.
G**B
Perfect Fit
I was getting an engine code that indicated this part was the issue. This replacement fit perfectly on my 2013 Ford Escape. Now the vehicle is running great and no more engine light.
R**N
Excellent fit
Install was simple enough with a clamp tool and hose clamp. You lose about a litre of antifreeze. The screws are very long but the job is manageable with a few tools. Engine code was cleared and vehicle runs fine.
Trustpilot
2 weeks ago
2 weeks ago