DOWNLOAD THE APP


Customer Services
Copyright © 2025 Desertcart Holdings Limited
DOWNLOAD THE APP
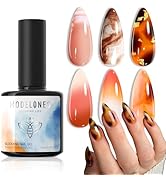
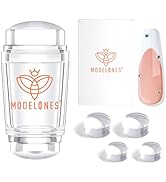
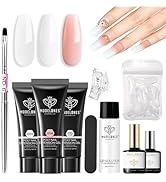
💅 Elevate your nail game with vibrant, durable poly gel perfection!
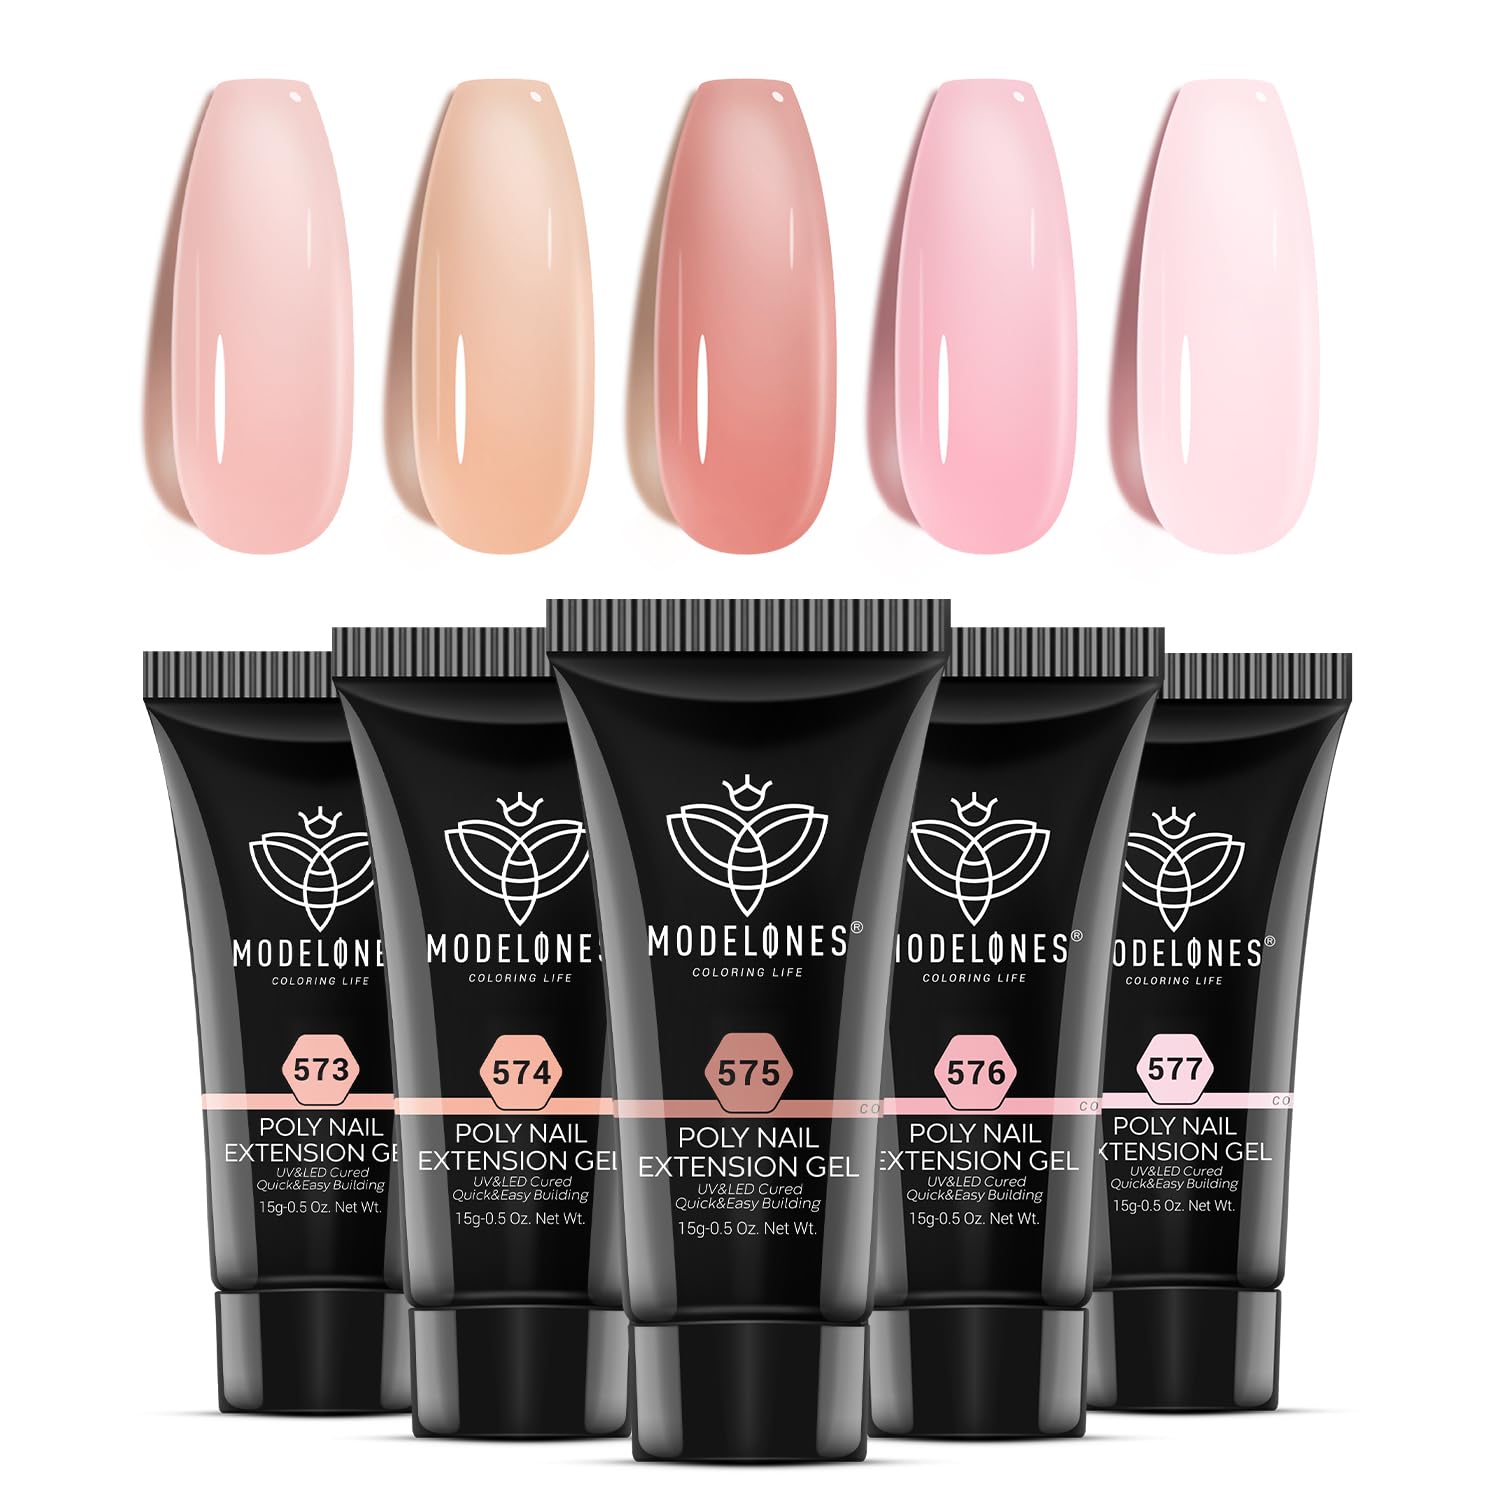
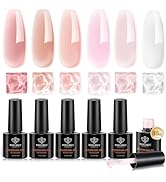
The modelones Poly Gel Set offers six trendy jelly gel colors in 0.5 oz tubes, delivering salon-quality nail extensions with a fast 90-second cure time. Designed for long-lasting wear of over 28 days, this non-toxic, low-odor gel is safe on natural nails and easy to remove, making it ideal for DIY nail art enthusiasts seeking professional results at home.


| ASIN | B0C4PGHZ9C |
| Additional Features | Non Toxic |
| Best Sellers Rank | #19,544 in Beauty & Personal Care ( See Top 100 in Beauty & Personal Care ) #27 in False Nail Gels |
| Brand | modelones |
| Brand Name | modelones |
| Color | A2-Pinkish Jelly |
| Customer Reviews | 4.2 out of 5 stars 1,060 Reviews |
| Finish Types | Shimmery |
| Item Dimensions | 8.19 x 5.31 x 0.98 inches |
| Item Form | Gel |
| Item Height | 2.5 centimeters |
| Item dimensions L x W x H | 8.19 x 5.31 x 0.98 inches |
| Liquid Volume | 3 Fluid Ounces |
| Manufacturer | modelones |
| Material Features | Non-Toxic |
| Nail Polish Type | gel |
| Number of Items | 6 |
| Number of Pieces | 6 |
| Special Feature | Non Toxic |
| Type | gel |
| Unit Count | 3 Fluid Ounces |
S**F
Best sparkle tips nails
Makes beautiful nails! Sparkle on the tips with the sheer colors looks great.
R**Y
Manicure at home
This has been a great product for my new hobby. I love that it is alcohol activated, because I have used acrylic powder products in the past, but never again.
C**R
Great
I did my first ever French tip with them and I like everything about them easy I like the colors. They’re all cute. It’s easy to use to me.
J**O
Love & Hate
Love these & the colors, but there is one color I love the most out of this set & it's the one numbered 591, I would love a bigger tube of it but it's not listed to purchase. There is no color name just the number, so how can I get it without buying this whole set again. I would have given these a 5 star rating, but the tubes are super small & I'm not sure I could get a full set bu using just one tube.
A**E
Modelones poly gel ( long review with how to tips)
I have been doing nails for a long time . Just started with poly gel about 3 years ago. I have used about every brand.( Be careful with builder gel. Just fyi. It’s much different than poly gel . Self leveling ( it will not stay put) . I use it for encapsulating) I ended up there when searching for poly gel as a beginner. Just thought I would put it out there. Ok. This poly gel is my favorite. Along with the beetles brand. But my main is modelones for sure. I always use a half tip then build the poly gel over just like acrylic. I use 75% or higher rubbing alcohol instead of the slip solution. I find it works better and doesn’t mix with the poly gel like the oil based slip solution does. Get yourself a good brush. I honestly have been using a concealer brush. I like the way it moves the poly gel. If you have naturally oily nail beds like I do and had a problem with them just falling off after a few hours or days follow these steps… mine stay on for 3 fill ins about 2 months or; until I take them off 1: push back your cuticles ( so important) make them non existent 2: buff out your nail beds ( 2 fingers at a time follow rest of steps and repeat for remaining fingers) the oil can build back up from the time it takes you to buff and dehydrate which will cause the gel to not adhere properly 3 : DEHYDRATE your nail beds. Wipe all dust off with an alcohol soaked paper towel. DONT WASH YOUR HANDS then use a dehydrator for your nails. I use morovan nail dehydrator 4: add an acid free nail primer I use morovan (not sponsored) I just found it works the best for my nail beds. Be very careful not to get ANY on your skin or cuticle area. 5: top coat. This is so very important. I love modelones top coat but use whichever you like. CURE for 60 seconds. DONT WIPE off sticky top. 6: apply uv glue to your tips ( score the tip before adding glue) cure under light for 60 seconds 7: buff out tip to blend with your nail bed 8: wipe off dust with rubbing alcohol on paper towel 9: re -due steps 3,4 ( do not put dehydrator or primer on your plastic nail tip only on your nail bed) step 5 top coat over the entire nail and tip. Make sure you do not get ANY top coat on your skin or cuticle area. I leave a little gap to ensure this and avoid lifting. Do not wipe off sticky residue. Work on one nail at a time if your new 10: squeeze the proper amount at the bottom of your nail and work your way up. When you get to your nail bed press the poly gel a little firmer to ensure no air pockets . You want it a little thicker right above the middle of your nail plate ( apex) to add strength to your nail bed and avoid them snapping off. (60 SEC CURE) The apex ( highest point of your nail plate ) should be thicker the loner your nails are. If you want “natural “ looking nails dont get them 5 in long. lol. Or they will just snap off the first time you put on your favorite pair of jeans. Whenever I do xxl nails they are thick. . You will figure out how much poly gel to use after practicing for a while. I added pics of my first sets and some newer ones. I do them every day so I have lots of practice. And I’m still learning. 11: file . File down them bumps, smooth out your cuticle area, level your poly gel so the craters and bump mountains are gone. lol. ** poly gel is super soft right after curing. The longer it sits after curing the harder it gets. * wash hands with no soap after filing . Make sure your hands are dry then paint. I hope this helps someone lol I wish there was a review like this when I was starting out. And I get everything from Amazon . FYI. Oh and use cuticle oil after and lotion them hands because the alcohol can cause your skin to dry out if your not careful.
M**O
Chemical Burns
Not sure what is different from years past, but the formula causes severe burns under and around my nails that take 3 weeks to heal. Big red and purple blood blisters and terrible peeling and sensitivity during the healing process. I bought this 5 years ago and I never had a problem, now I have to throw all of this away. The pain is unbearable.
J**R
Colors are way off
Love Modelones polygels but these swatches missed the mark. The two glitter gels do not look sparkly at all. I bought these looking for fall reds and none of them come close. 358 is nearly flowing orange. 359 and 360 are closer to pink with orange undertones. 361 is a true red 362 is identical to 360. 363 is a pale plum color. I'm bummed that they are more summer than autumn and not at all what they looked like but I will probably be able to mix them to get a decent color. Just be warned if you're also looking for fall red, these are not that.
K**.
Cute! Updated 💪
I used polygel before a few years ago when I first decided to start the DIY nail journey and I didn’t like them too much since I couldn’t figure out a smooth application. They always popped off within days. This time around after some trial and error, it came out pretty nice! The gel is sticky and thick but super easy to maneuver with slip solution or acetone. I didn’t use any tip extensions but created length with the gel then painted over them. Trying to get the ends to be thick and sturdy on the first application is a bit confusing but hopefully I’ll figure it out eventually. I had to keep going back to add more gel and curing all over again. The gel containers are super small and completely fit in the palm of my hand but a little goes a long way. For the price, this is a good bunch. Can’t speak for longevity yet but hopefully my nail prep was good enough to last for at least 2 weeks minimum. Update: I actually got a solid 2 weeks out of these before only one nail broke while I was doing dishes! The others still holding strong so I’m very much satisfied since it did what it needed to do. Perfecting my craft now!
Trustpilot
1 week ago
3 days ago