
DOWNLOAD THE APP


Customer Services
Copyright © 2025 Desertcart Holdings Limited
DOWNLOAD THE APP

🚀 Elevate your Raspberry Pi 5 with next-level NVMe speed and sleek design!
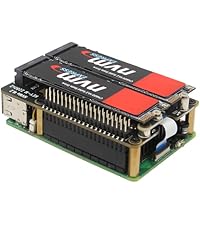
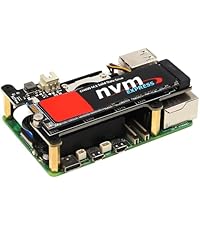
The Geekworm X1002 PCIe to M.2 HAT is a precision-engineered bottom board designed exclusively for Raspberry Pi 5 models (2GB to 16GB). It supports all standard M.2 Key-M NVMe SSD sizes (2230 to 2280), enabling ultra-fast PCIe Gen 3 data transfer speeds. Featuring a bottom-mount design that acts as a heat shield, it offers compatibility with official and third-party active cooling solutions. Installation is streamlined with factory pre-fitted threaded risers and a flexible power supply option via PCIe ribbon or PD 27W. This accessory transforms your Pi 5 into a powerhouse with reliable, high-speed storage, perfect for professionals demanding performance and sleek integration.


| ASIN | B0CQYBBNP5 |
| Best Sellers Rank | #588 in Single Board Computers (Computers & Accessories) |
| Customer Reviews | 4.0 4.0 out of 5 stars (126) |
| Date First Available | December 26, 2023 |
| Item Weight | 0.776 ounces |
| Item model number | X1002 |
| Manufacturer | Geekworm |
| Product Dimensions | 3.43 x 2.2 x 0.28 inches |
D**R
Super easy setup. Works exactly as expected.
Some reviewers, no small number of them have had issues receiving the incorrect screws, I did NOT have that problem. My NVME base was purchased with the corresponding metal case so this review is kind of for both of them. The NVME base was purchased in a pinch when shippment was delayed in a time sensitive setup for a Pimoroni base I ordered. I now have both and can compare them. Assuming the packaging bugs have been worked out, honestly the Geekworm BASE is much nicer. The factory pre-fitted and threaded risers are a wonderful item to simplify installation. There is NO documentation that comes in the box so forget about that, but if you look at the pics here on how they are setup you can figure it out, simply put the NVME goes to the bottom, not the top, the risers go between the Pi and the base. Attach the NVME, attach the ribbon cable, then screw it all together, Your hardware assembly is done. Boot to an SD card with Raspberry Pi OS on it, and run Raspberry Pi imager and write your OS to the NVME, Follow the setup instructions from Explaining Computers youtube page on the software setup to get the NVME going, I have mine set to PCIe Gen 3 and it is plenty fast. The complaints about them not working or wrong screws seem to be from right after it was introduced and I am going to assume those are just issues with early production items. The one I got went together super easy, and super solid. The NVME mount itself has a threaded standoff unlike the Pimoroni, which makes mounting the NVME much easier, although it only seems to support the M.2 2280 NVMEs, but that is what I wanted to use anyway. The whole thing Pi, Cooler, NVME base and NVME fit neatly into the Geekworm case, and through the risers that come with the case which are slightly shorter than the ones that come with the NVME base, the alignment is perfect, screwed together through the bottom of the case and it is solid as a brick. Complaints about WiFi interference with the case are not something I have noticed. WiFi is good and strong, bluetooth pairs up just fine. No interference with the ribbon cable to the case, although I did flatten the cable up against the Pi itself as much as possible without damaging it before assembling to the Pi. I also have a Logitech Unifying receiver / keyboard / mouse and notice no radio / connectivity issues with either. The ribbon cable installs MUCH easier and is less fiddly than the one that came with the Pimoroni. I do not regret either purchase, and they will serve my purposes very well indeed. But if I had it to do over again, I would have gone with 2 of these Geekworm bases and cases and been done with it straight out. Again at least with the units I received, they are spot on. SPECS of my build. Raspberry Pi 5 8GB Raspberry Pi 5 Official active cooler Raspberry Pi 5 Official power supply (USA) Geekworm X1002 NVME base Geekworm P580 case Crucial P3 Plus 2TB M.2 NVME SSD Logitech Unifying receiver. Summary. All of the issues I have read about in other reviews did NOT show up with my device. Installation was super easy, build quality is above and beyond what is to be expected at this price point. Functionality at least paired with my chosen hardware is perfect. Only time will tell about long term durability / reliabiliity, but if my initial impressions are correct, this will hold up and be a good performer.
M**E
Ubuntu 24 for Pi 5 works out the box
Installed Ubuntu 24.04.1 LTS 64bit, Using a generic USB to SSD enclosure and the raspberry pi imager, this worked without any modifications to any settings, configuration files or boot order on the pi or OS. Choose "other general purpose OS" in the pi imager to install Ubuntu to the SSD. Installed X1002 using the provided cable and hardware to the Pi5 8GB, then installed the NVME SSD with the Ubuntu Image on it. Booting will then brings you into the OS setup wizard. Once in the OS, updated to PCIE Gen 3 in the conifg.txt as per the directions on the support page listed in the description and there are no stability issues to report. Have tested installation on 6 different major brands of NVME SSD with no issues in recognizing the drive and boots to the OS without intervention. It is great the board mounts on the bottom with the SSD facing down, The PCB acts as heat shield if your project requires excessive read and writes, but if you are worried about heat from your SSD buy or print a case that mounts the pi on its side with vents on the top. Using the two push pins to power the unit from the underside of the GPIO gives it a clean install, just make sure they contact correctly and you boards are flush to each other. The mounting solution using the long screws to secure the two boards together that then protrude out the bottom side (same side as SSD) to install the risers works great too. The performance overall using the SSD is noticeably fast and is worth the ~$16 price tag, it might be more cost effective going this route than buying a quality Micro SD card.
G**T
a new low in QC
I noticed something fishy with the screws just like many other reviewers had, except that only with one standoff. One of them was the wrong thread size. 3 out of four were the correct thread size, and one was different. This should have been foreshadowing. I spent the entire day today trying to get this thing to recognize my NVMe drive, which it failed to do. I tried everything under the sun, including reseating the PCIe cable numerous times, etc. No, the drive does NOT have a Phison controller, so it should in theory work. However, nothing I tried even listed the drive (lspci or lsblk). Nothing works. I am quite sad because I really liked the concept, but the execution is quite lacking. I returned this and the corresponding case. Very disappointed.
A**Y
Works great with KIOXIA 512GB Gen4 NVME drive
Installed it on my pi with the geekworm metal case. Everything went together easily. To get your pi5 booting with nvme, you'll either need to load the special boot config raspberry pi image to an SD card (that you later remove) or boot from a regular raspbian sd card and run a terminal/bash window: # Edit the EEPROM on the Raspberry Pi 5. sudo rpi-eeprom-config --edit # Change the BOOT_ORDER line to the following: BOOT_ORDER=0xf216 # f216 = NVME, SD, Network, Restart in that order ...and it worked for me after that! Although geekworm doesn't mention HAT+ compatibility, this thing seems to work fine without having to manually enable pcie probing so it's at least partially compatible. Also, you're going to want to do this after getting linux up for the first time: # Add to bottom of /boot/firmware/config.txt dtparam=pciex1 # Optionally, you can control the PCIe lane speed using this parameter # dtparam=pciex1_gen=3 This will get you MUCH faster speeds. With my kioxia KXG80ZNV1T02 I get 700MB/s direct and 800MB/s dsync on the raspberry pi 5. It's almost a respectable computer (with GPIO pins).
K**V
This board is a Hat Drive, Bottom, which goes on the bottom of the Raspberry PI 5 board. I brought this so that I can boot Ubuntu 23 from the NVMe Hat drive instead of an external USB-C enclosure. installation is super easy, transferring the NVMe SSD to the NVMe Hat drive, installing the drive as per instructions provided. The Hat drive provided a READ transfer speed doubled that of the READ speed from the USBC external enclosure. It is good that it NOT a Hat Drive, Top, as that would obstruct the air flow of the Active Cooler. But being on the bottom, would be like a hot plate for the CPU. I will purchase a box fan to place on the bottom to help with the air flow. This is a good buy because it does seem to make the Raspberry PI 5 run faster.
E**K
All the correct hardware, assembly was easy, functions well. I like this bottom hat because it leaves the top open for any cooler and the gpio fully open. Unfortunately not may cases to pick from other then the geekworm P580.
S**5
Looks like this board comes with 2.5mm screws as specified however the press fit standoffs are threaded too small for the screws to fit! There's no way for me to use this board now and overall this has been a waste of time. Very disappointed and shocked that no one seemed to do any kind of testing to make sure this is usable. I'm not the only one with this issue, it looks like everyone who ordered on Feb 10 have this issue!
A**R
need small finger and case that goes with it but good and free up side of raspberryPy
J**C
Everything needed is in the package, easy to assemble, worked right away with a separately bought Corsair nVme. Freaking fast booting :) Check online how to prep the Pi 5 for nVme booting properly.
Trustpilot
1 week ago
1 month ago