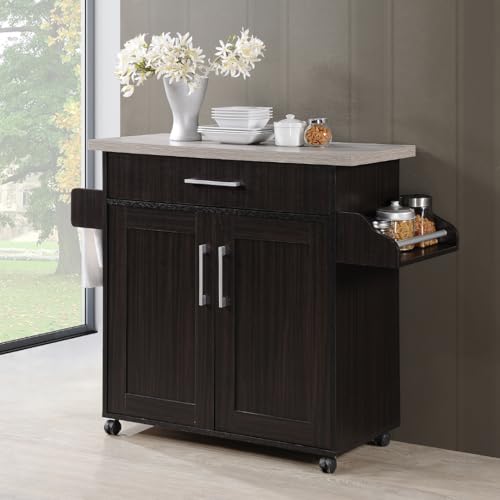


🍳 Elevate your kitchen game with style, storage, and seamless mobility!
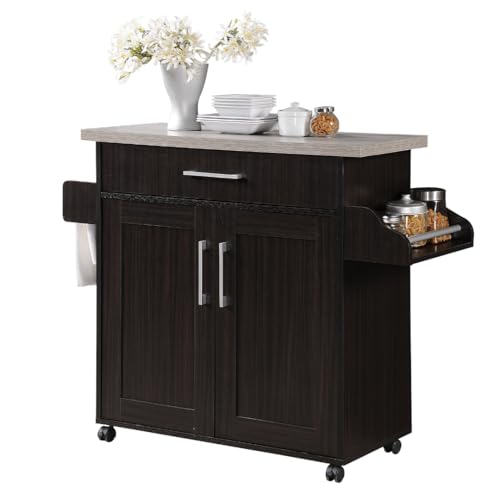
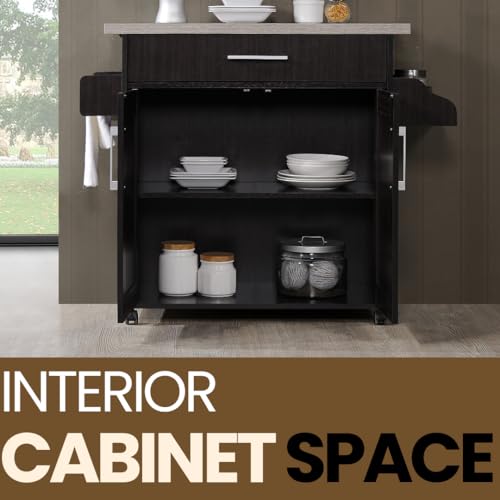
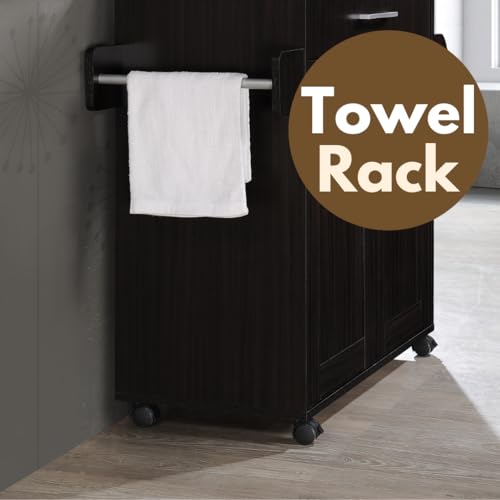
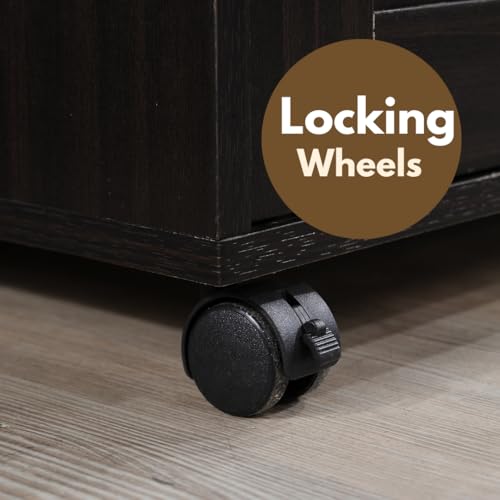
The Hodedah Rolling Wood Kitchen Island Cart combines engineered wood durability with a natural beech top, offering versatile storage through a full-extension drawer, enclosed cabinet, and side spice rack. Its lockable rolling casters provide easy mobility, making it an ideal compact solution for small kitchens, apartments, or dorms seeking extra prep space and organization.


| ASIN | B06VY71H43 |
| Assembly Required | Yes |
| Batteries required | No |
| Best Sellers Rank | #243,212 in Home & Kitchen ( See Top 100 in Home & Kitchen ) #75 in Mobile Kitchen Storage Islands |
| Brand | Hodedah |
| Color | Chocolate-grey |
| Customer Reviews | 3.8 3.8 out of 5 stars (31,882) |
| Fabric Type | Engineered Wood |
| Finish types | Nickel |
| Frame Material | Wood |
| Furniture Finish | Engineered Wood |
| Global Trade Identification Number | 00812183011298 |
| Included Components | Hardware |
| Item Weight | 64 pounds |
| Item model number | HIK78 CHOC-GREY |
| Manufacturer | Hodedah |
| Maximum Weight Recommendation | 64 Pounds |
| Number of Shelves | 4 |
| Number of pieces | 1 |
| Product Care Instructions | Wipe with Dry Cloth |
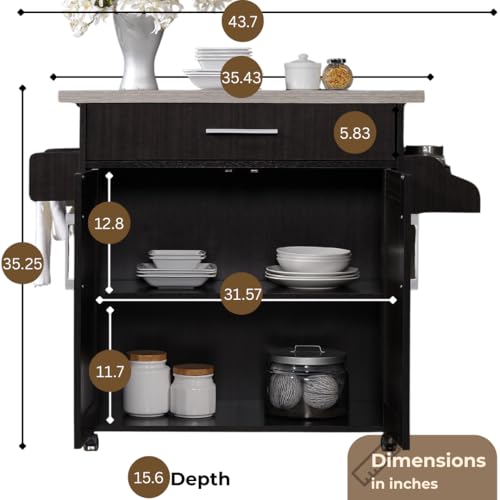
| Product Dimensions | 15.53"D x 46.65"W x 35"H |
| Shelf Type | Tiered Shelf |
| Size | H31.5" W46.65" D15.6 inches |
| Style | Traditional |
| UPC | 812183011298 |
| Warranty Description | Please refer to product description or store page. |
K**.
PLEASE READ: Nice and Sturdy, Great for the price! (Honest Review that helps)
For the price this is a great buy! My boyfriend and I built this in about an hour and a half. (And by that, I mean mainly my boyfriend.) just put on some music and you’ll be done in no time. We used a drill to put this together as well, which I would highly recommend. We didn’t run into any issues with the wood splitting. The instructions were fairly easy to follow, though I have a few recommendations that will make putting this together a lot easier: 1. Take out all the pieces and lay them out in an organized fashion on the floor. (You don’t have to do this but it just makes it easier to grab what you need during each step) 2. You will notice that the directions tell you to put screws in the middle of the rails in step 2, but there isn’t a hole for it. Don’t worry, the instructions are very generic, so you really do not need this third screw unless you absolutely want to and planning on loading the draws with a pile of bricks. (You will understand when you have the instructions in-hand but I will add photos) 3. Follow steps 3-5 exactly. The rails are also marked with an “DL” or “DR” 4. If you want to add the two pieces on the side. DO NOT add them after Step 5. The instructions have these two pieces as steps 6, 7 and 8 but if you build it in that order step 9 will be a living hell to get on. (Not impossible, just tricky) SO, complete step 9 first by adding the middle bar, and then go back and do steps 6-8. (We took our two pieces off, to better fit or kitchen and the look we were going for) 5. Follow steps 10 and 11 exactly. 6. In step 12 you will be putting on the wheels. Note that the instructions say to use 16 of the K screws. Don’t do that, as you’ll need the other K screws for step 15. Do not let this confuse you. Simply use the small package of screws that are inside of the bag of wheels. 7. In steps 13, you really don’t need that many nails. I would just do 4-5 on each side and move on to step 14. 8. The doors. The instructions want you to attach all four of the tan “hinges” at once and then connect the doors to the cart. Yeah, don’t do that. Drill/screw in one hinge to the top of one door. Place the door in the cart by sticking the peg inside of the hole in the corner. Then take the second tan hinge and add it to the bottom peg hole without attaching it to the door yet. Once this is done, slightly open the door panel, align the bottom part of the door with the bottom hinge, and slide it in so that the holes for the screws match up. Then drill/screw in those two screws. (This will make since when you are actually building it and are at this step) Do the same for the other door. 9. Two of the wheels have locks on them. You can unlock them by flipping the notch located on the side of the actual wheel. Then you can freely move the cart around or lock it in place. Then you’re done!!!! I really wish someone would’ve gone through and made a post like this, instead of saying the directions/instructions are hard to follow. They are not, we were able to figure these tips and tricks after trial and error, so I’m hoping this post will help save you some time. :) The only thing I’m not fond of is the gap in between the doors. This is definitely on the manufacturer as I am sure so people’s doors were the perfect length for the kitchen cart. I’ll probably put a small white card board backing on the back of one of the doors so that this gap is less noticeable. Overall I absolutely love the cart and would highly recommend it. It’s the perfect counter height, and easy to paint or add a marble vinyl to the top to customize it to your kitchen. (Or wherever your putting it). Like I mentioned earlier, please use a drill if you have one, it’ll save you time, hassle and you straining your hands to turn a screwdriver. Also put on some music, it will take you at the least 45- 50 minutes. If it takes you longer, it’s okay, it’s not the end of the world. ;)
T**O
Excellent quality for the price
Great kitchen island. It’s sturdy, easy to assemble, and provides very useful extra space. The spice rack and towel holder are convenient, and the wood top looks beautiful. Excellent quality for the price.
J**E
3.75 star rating.... Not bad, but could be better
This is really like 3 3/4 stars. Everything was predrilled well. So I was able to line things up very well. It looks very nice, and was the dimensions I needed for the storage I needed (made it into a coffee station for all my makers, mugs, coffees, teas, etc...). I did not assemble the towel bar or spice rack (took up too much space for where I needed it), but worked out great. A couple of the instructions could have been a little clearer (but I was still able to figure it out), and 2 pieces lost there label (otherwise everything else was well marked with stickers). I did not have any missing pieces. The cart top and inner shelf seem very sturdy. Once wheels are attached, the cart is countertop height (otherwise will be a little lower). The only thing that is not as sturdy is the drawer bottom (You have to build the drawer, fyi). The drawer bottom is a thick cardboard, so keep what you store in the drawer light (don't overstuff), and possibly use a liner (or buy something sturdier that would work for the bottom.... don't use anything thicker than the cardboard as it has to fit in a slot in the side pieces). The packaging was messy (Styrofoam everywhere), so prepare to vacuum after. You don't need power tools, but a powered screw driver would have been more handy (my hand was sore after, but using all hand tools was doable). Keep in mind this is made of pressed wood particles with laminent. My only real complaint, was that it arrived very scuffed (no dents or scratches, but the wood print in the laminent was rubbed off). Not happy about that, but fortunately most scuffs were on the inside where you can't see. The one big scuff that was on the drawer front was the worst, but I hid it with crayon, and now you can't tell. I didn't want the hassle of returning and repackaging (packaging was somewhat flimsy to repackage), so I dealt with it. If it didn't have the scuffs, I'd have given this a 4.5 star rating. This works great for the price, just wish the laminent was better. Also, handles are plastic (that's fine with me, and they look ok.... But I know some people did not care for plastic, may want to buy your own handles to swap out). Towel bar and spice rack bar was metal, fyi. P.S. I'm just a mom with small kids, I'm not a "handy" person, I did not swear and was able to build in front of my toddler (for safety depending on your kid, you might not want to..... LOTS of pieces!). It will take a couple hours to build, not the 70 minutes they suggest. An extra set of hands is also very helpful, but I was able to build it by myself (might also be why it took longer than recommended time, but I'd still allow for extra time. Don't put it together if in a rush). Take your time when building to get the pieces where they need to go and line up. Hope that helps. I'll add pictures if I can figure it out.
A**N
This is the second unit I have got for my dad’s kitchen, they practically match the cabinets already there , very sturdy & lock into place, he’s well pleased with them Great service I think the 1st one took 2 days & the 2nd one came next day at no extra cost , thank you for a great service & well made
K**Y
I almost did not buy due to all the negative reviews but I am glad I did. I found it easy to assemble and the directions were very clear. I did not run into any issues with things not lining up. All the pieces were in good condition. I ordered the black + beach and the black is not actually black. It’s more of a dark espresso which was a bit of a bummer but it still looks great. It isn’t the best quality product but you get what you pay for. Overall I am very happy with the purchase and it’s exactly what my kitchen needed!
N**L
Once built the island looks nice and spacious on the inside. But its a pain to build. Even the instructions state to nail in the back board before putting in the doors, do the opposite. Otherwise its so hard to align everything.
Y**F
Love ut
E**C
Material Pésimo y de baja calidad. Un verdadero fiasco.
Trustpilot
1 month ago
3 weeks ago