


🔴 Power up your radar game—ditch the mess, keep the edge.
The Escort Direct Wire SmartCord (Red Light) is a premium in-dash power cord designed for Escort radar detectors, featuring a red LED power and alert indicator, a convenient mute button, and a direct connection to your vehicle’s fuse panel. Compatible with current and legacy Escort models, it offers a clean, hardwired installation that frees up your 12V socket and keeps cables hidden for a professional, clutter-free look.


| ASIN | B0003NN83K |
| Best Sellers Rank | #207,641 in Automotive ( See Top 100 in Automotive ) #576 in Car Electrical Wiring Harnesses |
| Color | RED |
| Connectivity technologies | USB |
| Customer Reviews | 4.7 4.7 out of 5 stars (1,438) |
| Date First Available | 7 August 2012 |
| Item Weight | 90.6 g |
| Item model number | 0010057-1 |
| Other display features | Wireless |
| Product Dimensions | 3.81 x 7.62 x 18.29 cm; 90.72 g |
| Special features | LED Display |
| Whats in the box | Smartcord |
J**L
I used this to direct wire my Escort radar detector into my 2013 Golf GTI. PROs - Easy to hard-wire your detector and remove the unsightly coiled cord that's hogging your 12v power socket. - Cables supplied with it are generously long, should be able to install a detector just about anywhere you need. - The cable to the detector is flat and easily squeezes into tight spaces around windshield to hide from view. - The controller is exactly the same as the SmartCord that came with the original detector and allows you to see the status of the device and remotely mute alerts. CONs - I wasn't a fan of the hook and loop fastener used to mount the SmartCord controller onto the car. It sticks well to both the car and the smart cord, but they feel like they're only loosely connect to each other. In reality it's never fallen off and I doubt it ever will, it just feels like an unprofessional mounting option. I would probably skip the hook and loop if installing again and just use some good double-sided tape. My install was easy and comprised of the following steps: 1. Determine the locations of the various components 2. Route the wires appropriately 3. Connect to power and ground Where is the fuse box? -- Driver's side, open the door and it's behind the panel in the center console. Where I wanted the radar detector? -- Horizontal center of windshield, several inches above the dash to give a clear line of sight to the rear window Where I wanted the control panel? -- I placed mine on the lower center console below and behind the steering wheel. This isn't exactly ideal as I can't see the lights as they're blocked from view by the steering wheel, but I can easily reach the Mute button by feel, and that's the most important feature for me. Routing the cables was surprisingly easy. The cord to the detector is flat and easily fits between pieces of trim so it can be hidden. I specifically placed the SmartCord control in a location that made it easy to route wires without removing trim panels. I fed both input power and detector output cords through the underside of the dashboard in the drivers foot well, and into the fuse box. I then routed the detector output lead up and out the top of the fuse box, around the bottom of the windshield pillar, and along the gap between the dashboard and the windshield until it reached the center. It took a bit of tugging along the path of the cable, but eventually I had enough length of cable to reach the detector and enough slack to allow me to hide it. I just poked the cable into the gap along the bottom of the windshield with my fingers, squeezed it between trim at the bottom of the pillar, and down into the fuse box. I had quite a lot of cable left over, but I'm sure all cars and locations being different they supply enough cable to cater to all. I just used electrical tape to tie up the excess cable and tape it down to the side of the fuse box to stop it rattling around. To connect to the power supply in my vehicle I used a Bussmann ATM Mini Circuit Converter (Add-a-Fuse) to expand an existing ignition-controlled fuse slot so that the detector only comes on when the ignition is on. The only tricky thing to be aware of is that these fuse adapters only work one way round, so if it doesn't work the first time you need to flip it around and try again. Finally I needed to connect the negative lead somewhere. Most (all?) vehicles run the battery negative feed throughout the entire chassis, so all you need to do is find a (non-structual) metal screw / bolt that can be used to attach the negative lead to the chassis. I also used a multi-meter set to continuity mode just to be doubly sure I had a valid ground connection. In my case the attachment point for the chassis was quite a way from the positive fuse connection, so I just split the power cable down the middle (it's built to do this, don't worry) until I had enough cable to route the negative feed to a valid mounting point. I'm very happy with this kit and so glad to have free access to my 12v power socket again.
A**R
Works perfectly with my Escort 7500s, nice placement in my 2012 Ford Focus right next to the gear shift so I can easily mute the squawk of the detector while I'm driving. Installation was a bit of a hassle, not so much because of the actual wiring, using a fuse tap just used one of the fuses that turns on and off with the vehicle (that being the HVAC fuse) and I was golden. More so a hassle because of the mechanics yoga I had to do to get to the fuse panel on my car but other than that if you have a radar detector, don't waste your time with those coiled wires all over the place, save yourself the hassle of reaching over your dash and the eyesore of the coiled cables and get one of these.
R**K
Works like a charm! My car looks a lot cleaner now without the coiled wire hanging down to the AC power source. Easy to install, especially if you buy an "add-a-fuse" available on Amazon for just a couple of bucks. This prevents you from having to cut and splice. I recommend it!
A**R
Great product. My car looks great!!
R**O
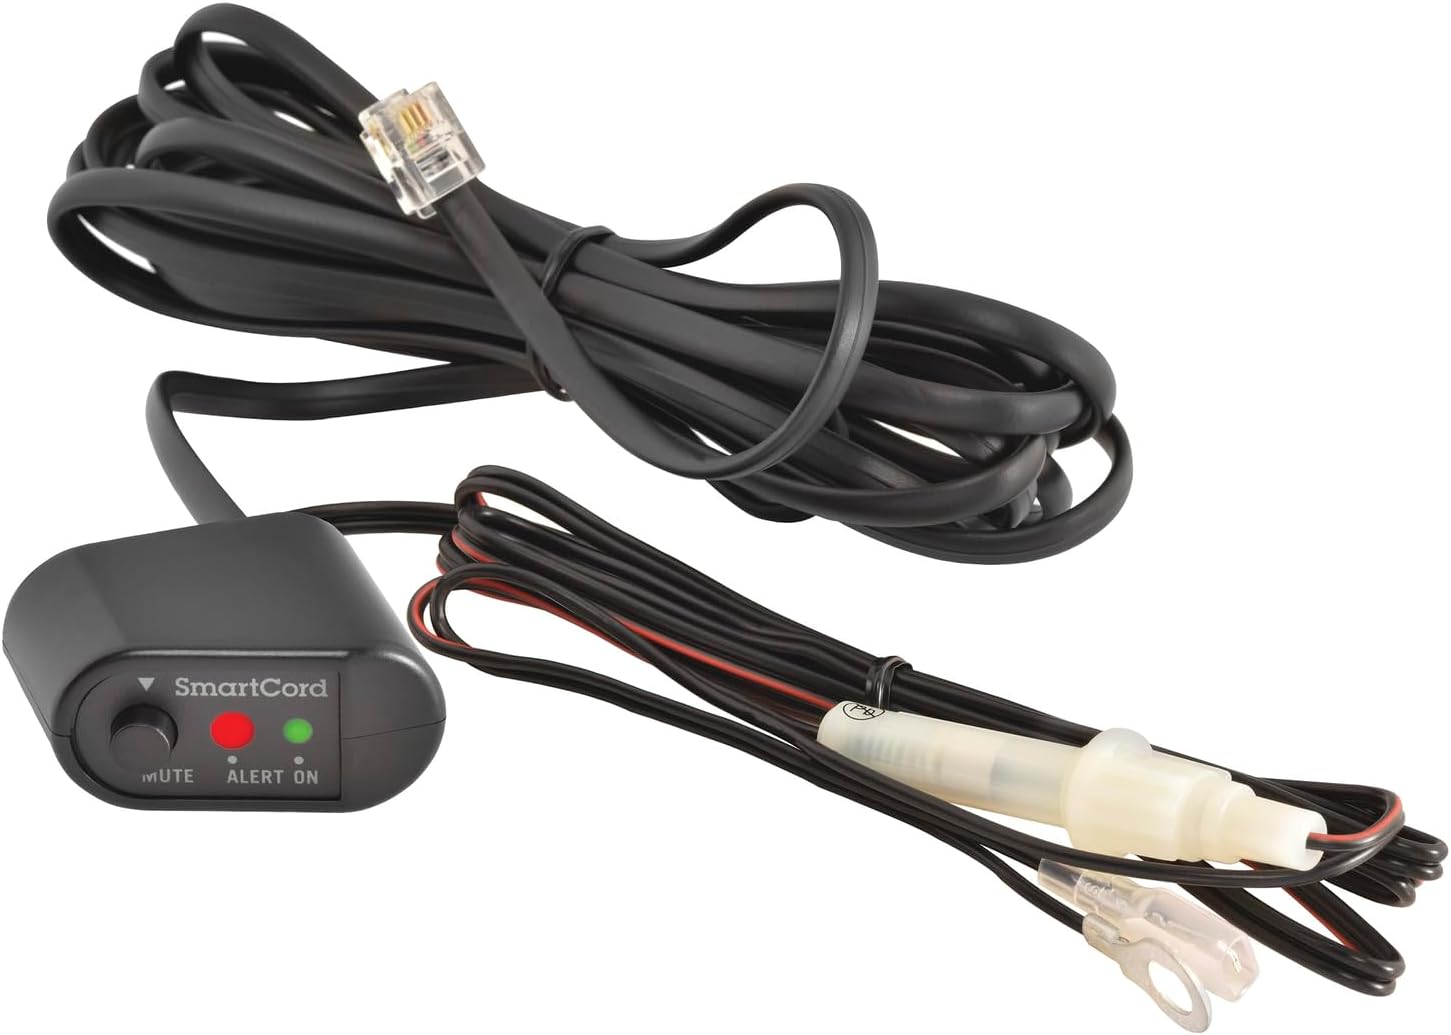
I used this hard wire system along with a Blendmount to fully integrate my Passport 9500ix into my car as inconspicuously as possible. My car (2004 G35 Coupe) has a fuse box right at the drivers feet, just forward of the door. I used a fuse tap to draw power from the circuit that controls the auto-dimming mirror. So the detector starts right up with the car, and turns off with it as well. I also bought a quick connect just like the one used on the included wire tap so everything was "plug and play" for me, If I need to remove it later. I mounted the "remote" on the driver's side of the center console, where the radio and AC controls are. It's in a perfect spot so that I can both see it (which I'll explain why it's important in just a bit) and can reach it by leaning forward in my seat just slightly. It also can't be seen by officers on either side of the vehicle. If the officer is on the drivers side, the steering wheel hides it. If the officer is on the passenger side, the center console hides it. Radar detectors are legal in CA, but it's well known the cops give you a harder time if they see you have one. From the remote, there are two wires. One which goes to the power source, and one to the detector. I tucked the wires in behind where the plastic of the dash meets the carpet and routed both wires to the fuse box. From the fuse box I ran the other wire that connects to the detector up the A-pillar and across the front of the headliner and down the little tunnel that is used for the mirror's auto-dim wire. It then comes out just a couple inches and plugs straight into my detector. There are no wires hanging anywhere and the detector sits very close to my mirror so, combined with my tinted windows, it's almost impossible to see. Now, on the remote there are two lights and one button. One is a blue light which indicates power (you can buy another version of this which has a red light for this, but otherwise they are identical products), a yellow light that flashes when you get an alert, and a mute button. This is really nice so you don't need to reach up to your detector and feel for the correct button - you can just tap the one and only button on the controller. Tapping it multiple times also locks out signals if you happen to have a GPS equipped "false alarm ignoring" radar detector. I'd have to say that my one and only complaint is that the remote has two separate wires coming out of it. A great, handy improvement would be to have the two wires be connected (like molded together) for about half the length, and those that need it to split up earlier can just pull it apart (kind of like speaker wire, where it's 2 wires together but you can split the two conduits apart because the insulation for each wire is just held together by a small seam of insulating material). That would help make install a bit cleaner. I didn't knock of a star because it's a small complaint, but if the manufacturer ever reads this, it's a suggestion they can take with them.
Trustpilot
1 month ago
1 day ago