


♻️ Transform scraps into garden gold—compost like a pro, effortlessly!
The Hungry Bin Worm Farm Composting Bin is a 20-gallon, continuous flow vermicomposter designed for indoor and outdoor use. It processes up to 4 pounds of kitchen waste daily, converting scraps into high-quality worm castings and liquid fertilizer. Constructed from durable, UV-stabilized polypropylene, it features an odor-free, low-maintenance system optimized for airflow and drainage, making it ideal for eco-conscious professionals seeking a sustainable, space-saving composting solution.


| ASIN | B01CRJGUOG |
| Best Sellers Rank | #526,891 in Patio, Lawn & Garden ( See Top 100 in Patio, Lawn & Garden ) #266 in Outdoor Composting Bins |
| Brand | HUNGRY BIN |
| Brand Name | HUNGRY BIN |
| Capacity | 80 Liters |
| Color | Green |
| Customer Reviews | 4.6 out of 5 stars 317 Reviews |
| Item Dimensions L x W x H | 24"L x 26"W x 37"H |
| Item Weight | 12.28 Kilograms |
| Manufacturer | HUNGRY BIN |
| Manufacturer Part Number | HBDOMX |
| Material | Polypropylene (PP) |
| Material Type | Polypropylene (PP) |
| Model Number | TBH0001-FBA |
| Product Dimensions | 24"L x 26"W x 37"H |
| Shape | Cylindrical |
L**I
Instructions were easy to follow unless you are like me who likes ...
Ordered mine on Sunday and arrived yesterday and I assembled it today. The parts look and feel very well made. Instructions were easy to follow unless you are like me who likes to jump ahead. I put the latches front and back instead of on the sides so I had to remove the top from the bottom part and the bottom part from the stands. The whole thing is easy to disassemble if you have to. I bought the worms from a local seller and picked up a bag of compost from Home Depot today which I mixed with coir and my compost is up and running. I put it under our covered patio which gets sun in late afternoon. To protect it from the sun and prevent heat build up, I used the box it came in to cover the bin around and the top and bottom loose cardboard went on the lid. I can't wait to harvest my first compost. 7/16/2018. Update: It has been four months since I started using my bin. It has been very useful in that it's big enough for the kitchen scrap we have. My worms have multiplied a lot. My only complaint is that when I collect compost that falls underneath, which is mostly the compost that I first put in at the start, there are worms in it. I don't know why. I thought red worms stay only at the top. The way I separate the worms from the compost is to put the compost in one of the composting trays that I have (similar to worm factory) with holes on the bottom. I put a bunch of kitchen scrap on top of the bin and then put the tray on top of that. I keep the lid open to let light in. Since the worms don't like light, the worms in my collected compost go down to the scraps. The collected compost also doesn't have food for them so they go after the scraps underneath the tray. This might be a bit of extra work but it's worth the effort and it's not really a big deal to me. 7/20/2018 Update: Just collected today a lot of compost that finally looks like has a lot more worm compost in it than the ones I collected before. I can tell because it has crushed eggshells in it which means it’s the layer with kitchen scraps, not the store bought bagged compost. As you can see, there are worms in it. As I explained in my first update, with light (lid opened) and fresh kitchen scraps underneath the tray, the worms will work their way down. When all the worms are gone, I can use the compost. 12/9/2018: This past summer, when it got hot, I relocated the bin under our covered patio where the sun doesn't hit it. When it got really hot, I kept the lid opened for a while and a rat was able to get inside. I think it ate a lot of worms (I read that rats do eat worms) because I noticed that there were less of them. So I took a metal window screen and covered the opening with it and placed a piece of heavy wood 24 inches long by 6 inches wide and one inch thick on front of the opening to make sure a rat doesn't try to go inside. Then I put the lid down. I noticed then that when I removed the wood, some worms were still crawling to the screen and lid. I was thinking that maybe they were trying to escape because they needed more air. When I placed the wood back, no worms were trying to escape. Now my worms are very happy and growing fast that I see clumps of them. 7/25/2019 Update: It has been over a year since I bought my Hungry Bin and I'm still loving it. Tried all other compost bins and this is the best. The bin has so many worms that they crawl all the way down to the collection tray. I remove them by exposing them in the light forcing them to crawl on the bottom of the pile and then scrape off the top which is free of worms. The collected worms go back in the pile. I stopped using the tray to separate the worms (I sold my vermihut). I still put a metal screen on the opening to give the worms ventilation and put the lid partway down. When it's too hot, I keep the door all the way up and placed boards on top (with gaps in between) to keep rodents from lifting up the screen. To keep the compost odorless, I keep a balance mix of green and brown waste by mixing in some dry brown leaves once in a while.
J**E
I use outside, it works very well (relatively maintenance free, doesn't smell)
I've had this for about a year and a half now. It works very well. I definitely would not have the ambition to deal with a tray type vermicomposter that required swapping things around. I keep my Hungry Bin outside (in the shade under a deck). The biggest drawback to that was that somehow the Black Soldier Flies (aka fat little maggots) did somehow make their way in when I only used the plastic top. I've found that a couple sheet layer of newspaper under the top works well to minimize that infiltration (and seems to keep the worms happier in all types of weather). The Hungry Bin does not smell at all and keeps up with the kitchen scraps (FYI we are big juicers in our household) just fine. I also have an envirocycle composter that I use for the random garden detritus (that is not a 5 star product IMO, but it does work okay as a convenient and attractive dump for garden waste inside the garden fence -- set up on top of 4 cinder blocks to drain the liquid directly into a container underneath). A useful tip if you are keeping the Hungry Bin outside (recommended, IMO, there are a variety of critters that seem to be in this worm-centered ecosystem) is to get a grill cover, shop light with an incandescent bulb, and a thermal switch to kick in when below freezing (and the shipping box opened up as a "winter coat" if you still have it). A 60w bulb gave me about a 20 degree bump in temperature -- i.e. good to 12 degree outside temp, a 100w about 32 degrees -- good to a 0 degree outside temp). The first winter I did this and it all worked just fine. This past winter I had a lot of other stuff going on and I got lazy (partly an experiment...) but I did not hook up the shop light. It was well-below freezing for over a month and the worms did NOT survive. The worms are restocked now and doing just fine again. Hungry Bin is a good, easy solution for not wasting valuable organic kitchen waste in my experience.
A**N
Love this bin! Added LED light strips to discourage wandering worms
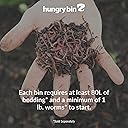
I've had the Hungry Bin for just over 100 days. Just about every time I went to add food, I had to save worms from being crushed by the lid, or from escaping altogether. As the worm population grew, so did the amount of time that went into rescuing the little guys. Knowing that worms generally try to avoid light, I first tried putting in some LED light pucks protected by ziplock bags. The light pucks weren't really a practical long-term solution (needed to switch out / recharge batteries often), but they worked as a proof of concept; the LED lights did deter some of the worms from coming out. Having seen good results with the pucks, I decided to go all in using a set of inexpensive waterproof LED Utility Strips that ran off of 12 volts DC. I wanted to share my hack because it definitely has helped reduce the number of worms. After installing all three light strips, I'm not seeing any worms try to escape! Parts: - Partsam 18 LED Utility Strip -- I started with one LED strip, then added two more after seeing that some worms were still crawling around the walls with just the one strip. - 12V wall adapter, rated for 0.5A that came from an old Cisco router - Mechanical screws, bolts - Small length of electrical wire - Few tools for getting things in place - drill, soldering iron to join the wires Installation: 1. Measured the amount of power drawn from a single LED strip. That came out to 0.12 Amps / 1.4 Watts. 2. The LED strips have a bare set of wires that come out of the back, in the center. I drilled a small hole in the wall of the bin so the wires could come out. 3. Each strip also has a pair of holes on either end so you can attach the lights. I drilled a pair of holes for these as well and used mechanical screws and bolts to fix them to the wall. 4. Cut / stripped the wire for the adapter. Soldered the lights in parallel so they each received 12V. 5. Plugged the adapter in, and am happy to confirm I've yet to see any any worms surface. Am I happy with the results? - Totally. The LED strips don't draw much charge, barely put out any heat, have a nice rubber gasket on the back that helps make the lights waterproof, and finally, installation wasn't too bad. - The lights have a clean look, and actually help me see corners of the bin when I'm burying food / checking up on the little guys. - The wiring around the bin is actually pretty minimal. I thought the whole thing would have a bigger footprint, but I think I'll be able to make things look pretty tidy. - Finally, I think the lights look great. They have a nice, clean look, and the light they give off has just the right amount of brightness and is a nice color, too. Update: Wanted to note that since installing the lights, I’m thinking it might be a good idea to put them closer to the top so that the bin can fill all the way up.
T**M
First Impressions
Quality construction and easy to assemble. Like others, I had a lot of escapees but was able to reduce the quantity significantly by placing a battery operated closet light inside the bin. I also suggest you get a thermometer to monitor the internal temp. I live in NC and temps inside the bin spiked to 90F which is way too hot for creature comfort and contributed/caused the escapees. I used the frozen water bottle trick others wrote about and the temps dropped below 80F and everybody seems happy. Right now I’m trying to learn the right combo of moisture, food, light, temp to keep my worms happy but I’m getting there. I don’t really have any complaints about the bin so far but didn’t anticipate being a worm farmer would be so involved but as with any crop it takes trial and error to find what works best for your ecosystem. There is a ton of info on the internet so do your homework before you jump into it. I’ve spent over $500 between the bin, the fill, worms, food, and lights but I think it will be worth it when I take my gardens to the next level. Good luck and I’ll update my post when the compost tea starts to flow and the casting drop.
T**N
Solid construction. Lid can be problematic.
NOTE: photo shows a modification I made to the product to let light into the top. IT IS NOT PART OF THE STANDARD PRODUCT. The extra light keeps worms in the material and discourages them from climbing up sides. Pros: - Easy to set up - Solid construction - Can be easily moved. Which is important because when fill it gets HEAVY. - Been using for 6 months and it's holding up well. Bottom latch works once you learn how to use it. - Continuous feed system works surprisingly well. You can take off the bottom and only SOME finished material falls through. Cons: - Lid is problematic when kept closed: - Worms tend to crawl up sides because it's dark (I experimented with transparent window on top to fix this, but too much moisture STILL an issue) - Too much moisture is retained and can lead to mites. - Internal heat build-up can be an issue. - Worms love to congregate in the bottom, so separating them from the finished castings is a bit of work. Misc recommendations: - Get a cheap "Duel, wired Digital Thermometer" (e.g. B0957XFHCK www.amazon.com/gp/product/B0957XFHCK) put one end into the middle of the bin and make sure the temperature doesn't get too high. If it starts to get a heat spike from decomposition, I use as broom handle to create "columns" all the way to the bottom to allow air to pass through. - I initially modified my bin to add a "window" in the lid using an old security cam dome to allow light in (this keeps the worms from climbing up sides). But I still struggled with too much moisture which lead to compost mites (NOT a health risk but ewww). SOLUTION: just put some screen material (like what is used for a screen window or door) over the top and leave the lid open. Controls the moisture, keeps pests out like fruit flies. - Buy and use Food Grade Diatomaceous Earth. This controls insect pests and does not hurt worms. In fact, it serves as grit to aid in their digestion! - If you use coffee grounds, buy and use Oyster Shell Flour to balance out pH levels. Also serves as grit. - Use a paper shredder to shred cardboard boxes. Just make sure to NOT shred labels or tape. Soak cardboard in water and wring out before using. Worms LOVE pizza boxes. Manufacturer recommendation if they read this: Include some kind of secure screen lid that fits security. It would be used when the lid is open to control moisture. And when the lid is closed, it would just to keep worms better contained.
J**E
innovative product with phenomenal customer support
I have struggled with compost piles for years. Between getting the portions of material correct, keeping it hot enough, turning it and keeping rodents out I had all but given up. This worm bin checks all the boxes. It it simple to set up and let the worms do all the work. It is extremely sturdy but easy to move. I have it inside at the moment because of the cold weather and have not noticed any smell. Aside from the great product their customer support is amazing. I had an inquiry and got an immediate reply. This company went above and beyond to make sure I was a happy customer. I love buying products from a company I can trust. I was also pleasantly surprised by the low impact packaging that was used. All the parts fit nicely together in one cardboard box. No tape or plastic to dispose of, the cardboard went right into the garden. I highly recommend this worm farm compost bin, it's simple, effective, and will last forever.
W**N
Large, easy to feed, easy to manage, well made, and works great... Love my Hungry Bin
Love my hungry bin. It is my favorite worm farm of the 3 different worm farms I have. The price is steep for these, but it works very well for me so far. I am very happy with this purchase. It does a good job of managing moisture content and keeping my worms happy and in the bin. I haven't had a chance to harvest from the bin yet, but if that process goes as well as the feeding and tending to the bin then it will be no problem. I will probably eventually add some more of these bins later. Assembly of the bin wasn't too difficult. It does require assembly, but after a few minutes looking at the diagram while trying to assemble the legs/wheels I was able to sort it out and then things just went together quickly. Overall it is a well made product and would buy again.
J**D
Makes excellent compost,keeps worms alive a long time!
I’ve had this compost bin now for 6 years and it’s phenomenal. We throw our coffee grounds, banana peels, veggies etc in there to some worms I added years ago. The system works excellent and the compost produced is great. I’ve used it to grow Microgreens with really great results. Highly recommend this, it’s had held up well for the time I’ve had it, I’d just make sure to keep it in the shade so the plastic doesn’t degrade.
D**S
Fab wormery
Expensive but amazing
A**.
Works great.
Worked great. Worms are happy and this thing catches the "worm tea" aka liquid gold. Good stuff.
M**R
Meine Würmer bekamen zu wenig Sauerstoff
An sich ein sehr gutes Produkt, leider sind die vom Hersteller eingestanztenLuftlöcher im Deckel der Tonne zu klein. Die Würmer bekommen somit zu wenig Sauerstoff und ergreifen die Flucht. Bei offenen Deckel gibt es kein Problem. Die ersten drei Tage ließ ich die Tonne mit geöffneten Deckel unter dem künstlichen Licht stehen, so dass die Würmer sich an ihr neues zu Hause gewöhnen können. Danach verschloss ich die Tonne mit dem vorgesehenen Deckel und die Wurm Flucht setzte sich in Gang. Schließlich öffnete ich den Deckel wieder und ließ das Zimmerlicht wieder brennen. Die Wurmflucht hatte wieder ein Ende. Aber das konnte es ja nicht sein, ich kann ja nicht 365 Tage lang das Licht brennen lassen, also musste eine andere Lösung her. Ich machte mich im Internet schlau. Anfänglich dachte ich den Würmern wäre es zu trocken, somit übergoss den Bio Müll zwei Tage hintereinander mit jeweils 500 ml Wasser. Tatsächlich krochen keine Würmer aus der Tonne. Nun dachte ich, ich hätte das Problem gelöst und schloss den Deckel erneut. Am nächsten Tag befanden sich wieder Würmer auf dem Fußboden, die durch die Ritze zwischen Behälter und Deckel flohen. Nachdem ich den Deckel wieder öffnete und alle Würmer in dem Biomüll setzte, war wieder Ruhe. Stundenweise versuchte ich ein Experiment: ich ließ die Tonne ohne Lichtzufuhr aber mit geöffneten Deckel stehen. Alle zwei, drei Stunden schaute ich nach, und erstaunlicherweise befand sich kein Wurm auf der Flucht. Schließlich führte ich dieses Experiment eine ganze Nacht durch und war erfolgreich, seitdem der Deckel geöffnet ist, aber in einem dunklen Raum steht, will keiner der Würmer mehr abhauen. Bereits beim Zusammenbau fielen mir die kleinen Löcher im Deckel des Herstellers auf. Ich dachte, na, ob das für ausreichend Luftzufuhr ausreichend ist? Da das Produkt aber sicherlich ausreichend getestet wurde, bevor es in den Handel ging, machte ich mir hierüber keine Gedanken mehr. Ich werde nun in den kommenden Tagen mit dem Bohrer weitere größere Löcher in den Kunststoffdeckel bohren. Auch habe ich bei Amazon noch ein Moskitonetz für Bio Tonnen bestellt. Da es mir aber zu umständlich ist, dieses immer abzunehmen, um den Müll einfüllen zu können, werde ich mich für die Bohrlöcher im Deckel entscheiden. Auch finde ich es sehr schade, dass die Betriebsanleitung für die Erstanwendung nur in Englisch beigefügt ist. Hier wäre es sicherlich sinnvoll, weitere Sprachen mit aufzunehmen. Aufgrund der beschriebenen Defizite erhält das Produkt von mir, einen Stern weniger. Ansonsten finde ich das Produkt genial, hochwertig und einfach im Aufbau. Gerne hätte ich die Antwort des Herstellers auf mein angesprochene Problem mit den Luftlöchern gewusst. Vielleicht habe ich Glück und Amazon meldet sich bei mir diesbezüglich. Ansonsten scheinen sich meine Würmer mittlerweile wohl zu fühlen. Nach einer Woche tritt bereits Wurmsaft aus. Hierzu füge ich euch noch Bilder und ein Kurzvideo bei.
M**S
Very Happy with my Hungry Bin
I am Very Happy with my Hungry Bin. I was questioning any kind of worm farm and the ability to take advantage of all aspects. I am all about reduce, reuse and composting so this concept of composting, while using the castings for my garden and even the liquid at the end was a great idea, if it worked. I tried this idea in a Rubbermaid container and actually had a results. This convinced me that with a great system it could really worked. It does. I started in April and have had plenty of nutrient rich liquid and castings for my vegetable garden. I am preparing for the coming winter and will be taking the bin in my workshop and not even worried about any smell. I guess if done right there is very little to none. I will also say that the customer service from Scott B. was fantastic and quick. This was worth the purchase for me.
B**N
So easy to use!
Best worm bin out there!
Trustpilot
3 weeks ago
2 months ago