
DOWNLOAD THE APP


Customer Services
Copyright © 2025 Desertcart Holdings Limited
DOWNLOAD THE APP
![- Auto Ventshade [AVS] In-Channel Ventvisor / Rain Guards | Fits 2015 - 2024 Ford F-150, 2017 - 2024 Ford F-150 Raptor SuperCrew - Smoke, 4 pcs. | 194975](https://m.media-amazon.com/images/I/41FENJYpbVL.jpg)
🌬️ Elevate your ride’s airflow & style — don’t just drive, thrive!
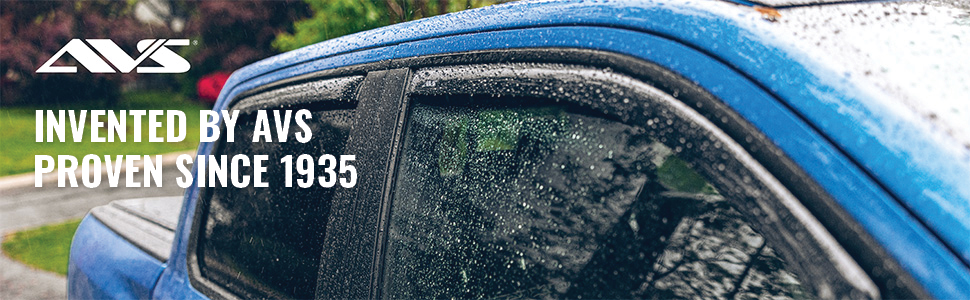
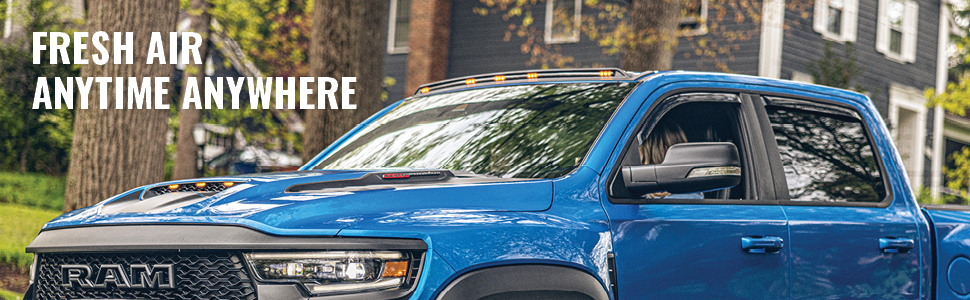
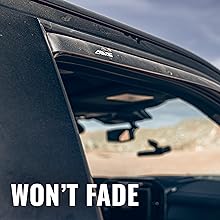
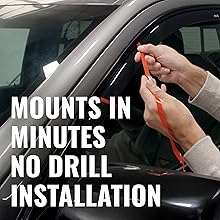
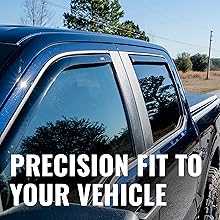
The AVS In-Channel Ventvisor is a precision-engineered, smoke-tinted acrylic accessory custom-fit for 2015-2025 Ford F-150 SuperCrew and Raptors. It installs easily with 3M adhesive tape inside the window channel, providing sleek, weatherproof ventilation that keeps rain and debris out while circulating fresh air to eliminate odors. UV-resistant and impact-modified for lasting durability, it supports modern auto up/down windows with a simple recalibration process. Backed by a Limited Lifetime Warranty, it’s the ultimate upgrade for fresh air and style on every drive.


| ASIN | B00PCEG7A6 |
| Auto Part Position | Front, Rear |
| Best Sellers Rank | #15,571 in Automotive ( See Top 100 in Automotive ) #28 in Side Window Wind Deflectors & Visors |
| Brand | AVS |
| Brand Name | AVS |
| Color | Black |
| Compatible with Vehicle Type | Car, Truck, SUV |
| Customer Reviews | 3.9 out of 5 stars 7,599 Reviews |
| Exterior Finish | Smooth |
| Fit Type | Vehicle Specific Fit |
| Global Trade Identification Number | 00725478147926 |
| Included Components | In-Channel Ventshades, Install Sheet |
| Installation Type | Self-Adhesive |
| Item Type Name | Wind Deflector |
| Item Weight | 2.22 Pounds |
| Manufacturer | Truck Hero, Inc. |
| Manufacturer Warranty Description | Limited Lifetime Warranty |
| Material | Acrylic |
| Material Type | Acrylic |
| Style | In-Channel - Smoke |
| Style Name | In-Channel - Smoke |
| UPC | 725478147926 |
| Unit Count | 1.0 Count |
K**L
Fits & Works on 2022 F150 with auto close windows
*** This is not a paid endorsement, although I wish it was because these truck parts are getting expensive *** Just installed these in channel AVS Ventshades on my new 2022 F150 SCREW, no problems with install, no bounce back on first roll up, no need to “pull” the visor out for it to work and the look is nice and clean as I expected. Real test will come in 2 - 3 days after allowing time for adhesion to sit with the windows up. I will provide a final update at that point. As others have said in the comments, proper installation is the key to avoiding bounce back or hitting. You MUST insert the tabs at the front and back of the visors in between the trim and frame for these to work. This sounds difficult and might even look “off/weird” when you dry fit them but the final look is clean and sleek. For the front doors, there is a tab on the front and rear of the visor, the rear goes in between the trim piece and door frame, the front goes in between the trim piece and mirror trim. For the rear doors there is only one tab at the front of the visor that goes between the trim and door frame. Below were the steps I followed, upon final window roll up I didn’t have to crawl my window into place or hold the visor out for the window to close. The front windows even auto closed on their own. 1. Read these instructions and perform a dry fit first to familiarize yourself with placing the tabs between the frame and channel. If you attempt to roll up the window while dry fitting, expect the window to bounce back as you have not adhered the visor to the channel yet. 2. Clean all 4 window channels with the provided alcohol swabs. 3. Front windows a. Start by peeling back 1 – 2 inches of the tape backing on each side. b. Insert the rear tab in between the door frame and trim. (I used a non-marring panel removal tool to open it up a little), working from the back to the front push the visor into the window channel, once you get to the front, insert the tab in-between the mirror cap and trim. c. Before pulling off the tape, give the visor a firm push up, you want to “stage the visor in its final resting place. d. Slowly pull the 3M backing off from one side whole pushing the visor up and forward, again you are assisting the visor into its final resting place. e. Once the backing was removed, I placed my non marring tool into the window channel and gentle ran it along the back of the visor while pushing up to give it a little help. f. Slowly roll up the window. 4. Rear windows a. Start by peeling back 1 – 2 inches of the tape backing on each side, unlike the front visor, there is a 1.5” vertical strip at the rear of the visor, peel that off completely. b. Insert the front tab in between the door frame and trim. (I used a non-marring panel removal tool to open it up a little), working from the front to the back push the visor into the window channel. c. Before pulling off the tape, give the visor a firm push up, you want to “stage the visor in its final resting place. d. Slowly pull the 3M backing off from one side whole pushing the visor up and forward, again you are assisting the visor into its final resting place. e. Once the backing was removed, I placed my non marring tool into the window channel and gentle ran it along the back of the visor while pushing up to give it a little help. f. Slowly roll up the window. If you are more of a visual learner, head over to the tube and search for realtrucks How to Install AVS In-Channel Vent Visors on a 2017 Ford F-150
S**R
Won't drive without 'em!
Many years ago I was a smoker and these were an absolute must-have if you smoke while driving. However, over that time I realized how indispensable Ventshade are whether one smokes or not! These are the brand standard and even though I don't smoke anymore, Ventshades will be the very first thing I add to any new vehicle I purchase in the future. I have had them on every vehicle I've owned since 1998, when I bought my first new vehicle. I used to prefer the In-Channel version because it's a much cleaner look. However, with Fords (2018 F150) window sensors, they tend to create problems, as the sensors are so sensitive, the windows will hit the Ventshade and return to the open position. Not to mention, the tolerances are so tight, the window makes an annoying "thunk" when the window closes. I used the stick-on version on the new truck and they look fine, as they blend well with the color (Magnetic). They stick out further as well, providing more venting and sun protection. I had a set previously, on a 2003 Jeep Liberty that lasted over 10 years. No doubt that these will last as long as I own this truck!
S**I
I feel it is a great product, just not for me
I am not happy with this product! After installing them without a problem on my last truck, these installed well, but would not let my windows close at first, then when I did get them closed, they would not seal , and the first time I went to close the drivers window, it shattered
A**M
Durable and Reliable Fit for My F-350
I’ve had these AVS rain guards on my Ford F-350 for about three years, and they’ve held up really well. The durability is excellent no cracks or fading after years of use. The thickness of the material feels solid and strong, which adds to the overall quality. The size was a perfect fit for my truck, no gaps or issues once installed. The only downside was the ease of installation it took more time and effort than expected. But considering the long-lasting performance, I’d still say they offer great value for money
A**R
don't be shy
good quality and good fitment....has a very sleek look to it more than I wanted however I don't have any issues so far with it. works great to keep the window cracked open for air circulation. just did not like the part of installation with the front piece that goose into the window trim panel. but still worked as needed and easy to install...only took 15-20 mins for all of them.
T**S
Can't go wrong.
Perfect fit and good quality. I always use AVS.
J**Y
Look good and they work
Please forgive me while I sound like a proud daddy .... I bought a 2024 F150 Lariat in Star White Tricoat (kinda like a pearl, metallic white) with the 3.5L hybrid turbo engine, the 7.2kw generator and the Off Road package, this past Veterans Day. Beautiful truck. I have these window deflectors on my wife's SUV and had them on my other F150 that I traded. Here in the deep South, a hot car can be brutal, especially after a summer rain. These allow the car, or truck, to be cooler upon return. These have 3m tape which adheres to the body above the window and I like this better than the kind I put on my wife's SUV. They have a small adhesive strip but fit in the window guide and were a pain to install. The two rear ones have fallen off. I told her I would replace them with ones like this to fit her car, but she said she was ok with the two of them These add that little bit extra to make Charlotte, uh, I mean my new F150 Lariat look even better.
M**N
Very disappointed
I’ve used AVS vent shades on all my trucks for years and never an issue. I received this set for my F150 and they were scratched right out of the package so I was disappointed over that. I decided to use them anyway to avoid the hassle of driving an hour to a UPS store to return them. Installed the left front and it absolutely would not allow the window to go up. The window hits it and automatically goes back down. I tried multiple times to get it to work pushing and pulling on the vent shade but no matter what I tried it won’t work. I have probably installed 50 sets of these or more on my trucks and for other people so it’s not installation error, I know how to do it. AVS quality has gone downhill and I guess I will make the one hour drive to return them. I guess I should have payed more attention to the “frequently returned item” on the sale page. I’m beyond disappointed because I love having vent shades so I can have windows cracked and not worry about the weather. Do better AVS and make made in America mean something.
Trustpilot
1 month ago
3 weeks ago